Class 12: Teaching with Video

Don't talk, Screencast

Edtech guru, Kathy Schrock defines screencasting as “the capture of the action on a computer screen while you are narrating. Screencasts can be made with many tools and are often used to create a tutorial or showcase student content mastery.” A related practice is slidecasting (creating a PowerPoint or Apple Keynote slideshow and then screencasting your narration of it as it plays on the screen). Here’s my Keynote turned video.

There are many other variations – Paperslide Videos, anyone?

Here’s a few tips for video creation:
  • Keep it simple. Think of audience and purpose. See One Take Video
  • I favor taking complex instructions and turning them into multiple shorter videos covering specific aspects of the task. Some students know one thing and not another. Why make them sit through a long how-to.
  • I use a plug in mic (just a standard iPhone earbud mic works well) rather than the microphone built into my Mac. I do a quick test screencast to check the volume level and mic position first to get sound level right.
  • I first practice the skill a few times to find efficient ways to demonstrate and describe what I am doing.
  • If I will be entering much text as part of the task, I create a text document first so I can copy/paste text into the app I’m demonstrating ( I hate watching videos of people typing.)
  • I make sure any images, websites or other content I will use in the video are readily available.
  • I try and do the screencasts in one take. I don’t worry too much about flubbing words – hey, it’s only a screencast.
Three options for teaching with video – there are many more

Option 1: Screencast with “Loom.” An easy to use Chrome browser plug in – works on any computer or Chromebook. Your video is hosted at Loom.

Loom is a free Chrome browser plug in. To get Loom open your Chrome browser and get the Loom extension here.  It makes it super easy to record using your webcam, screen or both. The resulting video can be embedded into a blog or shared via email or social media. A great way to explain something in a visual way.

Note: Since making this video the embed code is now found by clicking the curved Share Arrow at lower right of video. Then pick </> Embed 
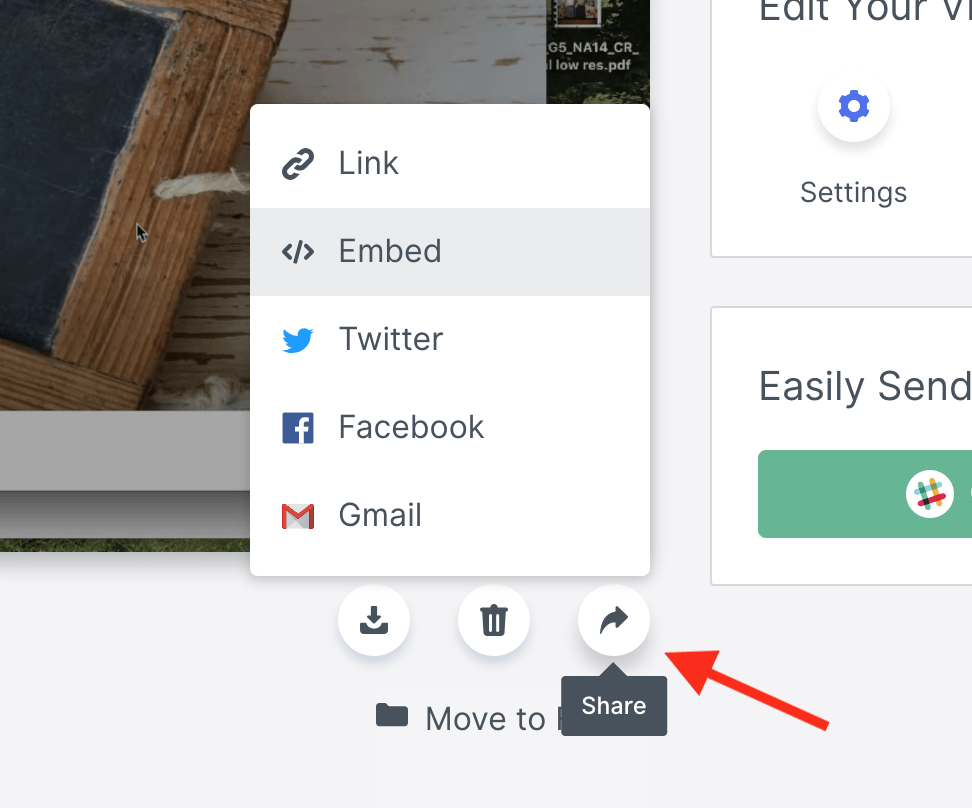
Get Loom embed code


Option 2: Screencast with Quicktime Player (easy and built into Macs). But if you want to post on blog, you need to “host” the video on YouTube.

I typically use Quicktime Player, which is built into the Mac OS. It’s easy to use and quickly uploads to my YouTube account.  Here’s a screencast I made on how to use Quicktime Player to make a screencast. (very meta)


Option 3 – Turn someone else’s video into a lesson

First off – a quick nod to ViewPure – an easy way to share video content with students without “risking” related sidebar content. Click here to “purify” a video.

Here’s two useful video lesson builders.

  1. TEDed – build a lesson around any TEDed original, TED talk or YouTube video. Note you cannot embed a TEDed lesson. So you could get a screenshot and provide a hyperlink.
  2. EdPuzzle – Pick a video, add your magical touch and track your students’ understanding. Create an EdPuzzle account, then turn an existing video into a lesson. You can share the result with an embed code.

Assignment 3: Use video to support a lesson | Completed work

Student’s will use class time to design and create a video supported activity using any of these tools. They will use HTML Snippets (on WordPress) to embed it in a blog post.

Then in your blog post briefly describe:

  1. Audience and purpose: For example, is this to help parents with homework?
  2. How you would integrate it into your lesson: For example, the 1st day of class, I created time to meet individually by using screencast for Adobe Spark Post and WordPress instruction.

Remember, if you use Quicktime Player, they should plan to load it up to your YouTube account. If you use Loom the video hosting is taken care of.

How to use HTML Snippets to Embed External Content on the blog

Class 9: Screencasting Techniques

We will open our class with a student updates on their progress on our Memorial Project and agree to some firm due dates. Then we will turn our attention to a new skill – screencasting.

Screencasting / Slidecasting

Edtech guru, Kathy Schrock defines screencasting as “the capture of the action on a computer screen while you are narrating. Screencasts can be made with many tools and are often used to create a tutorial or showcase student content mastery.” A related practice is slidecasting (creating a slideshow and then screencasting your narration of it as it plays on the screen). One trick I’ve used is to create an Apple Keynote presentation and use built in tools to record my narration of slides and use Apple QuickTime Player to export a video. Here’s how.

I make use of many edtech tools in my classes and workshops. Rather than teaching an edtech tool to everyone in a whole class setting, I think it is more efficient to make a short screencast and post it to my YouTube collection. That creates many flexible learning “tutorials” that I can use as part of flipped or blended lessons.

Here’s a few tips for screencasting:

  • I favor taking complex instructions and turning them into multiple shorter videos covering specific aspects of the task. Some students know one thing and not another. Why make them sit through a long how-to.
  • I use a plug in mic (just a standard iPhone earbud mic) rather than the microphone built into my Mac. (The built-in mic on my desktop sounds distant and echoes because of it’s placement in a corner of my office.) I check the volume level and mic position first to get sound level right and make sure I’m not “popping” when I say my “Ps.”
  • I first practice the skill a few times to find efficient ways to demonstrate and describe what I am doing.
  • If I will be entering much text as part of the task, I create a text document first so I can copy/paste text into the app I’m demonstrating ( I hate watching videos of people typing.)
  • I make sure any images, websites or other content I will use in the video are readily available.
  • I try and do the screencasts in one take. I don’t worry too much about flubbing words – hey, it’s only a screencast.

I typically use QuickTime Player, which is built into the Mac OS. It’s easy to use and quickly uploads to my YouTube account.  Here’s a screencast I made on how to use Quicktime Player to make a screencast. (very meta)

Screencasting with CaptureSpace

This week we’ll explore how to screencast / slidecast using the CaptureSpace tool that’s built into UP’s MediaSpace. It’s a robust app that opens up a few more options for capture and editing that using Quicktime Player.  It also provides a place – MediaSpace – where student’s can upload the finished product.

Note you might also want to check out video tutorials on Microphone setup and how to Edit Your Screencast Before Upload

Assignment | See Student work here

Student’s will use class time to design and record a screencast (or slidecast)  using CaptureSpace. (Or if they use Quicktime Player, they should plan to load it up to there YouTube account.) It could be related to our Memorial Project or an upcoming lesson they hope to use in their placement, or just some content or skills they would like to describe. (You could also try a “slidecast” – record an audio narration as you deliver a slide presentation. Here’s how.)

After creating and uploading the video to UP MediaSpace, students should write and upload a blog post that describes what they hoped to accomplish with the video and what they see as the challenges and opportunities of screencasting / slidecasting. They should use the MediaShare “Share” function to create an embed code so they can include to their screencast in the blog post.

Here’s a how-to video explaining how to do that (made with QuickTime)

More resources on flipped and blended learning tools at edMethods Teachers’ Toolkit

Haiku How To

haiku_4_by_asdg

Please watch the following amazing, insightful, and provocative Screencast to learn how to Haiku Deck like a pro:

Prompt: Students were asked to design a flipped lesson and then write a blog post that showcases their flipped lesson and reaction to designing it.

Beyond this being an incredibly fun assignment to complete, I was also pleasantly surprised at how easy it was to create the Screencast itself. I would love to incorporate this sort of thing (and other means of flipping lessons) into my future instruction but I have the same reservations that I have discussed in previous blog posts. Namely, I worry about the accessibility piece (will all students have an equal opportunity to view and really engage with the Screencast or other digital tools that I design & assign?) and also whether or not my students will actually watch/complete what I assign for them to do at home. For example if my purpose is to have students come to class ready to participate in an engaging discussion but only a few of them actually watched the Screencast prior to then my instruction will be rendered pretty ineffective. I also worry about demanding too much of my students’ time outside of the classroom–a reservation I have about assigning homework in general. Maybe this is blasphemy but I don’t really want my students to be always thinking about social studies, I want them to have time to just be kids! Regardless, I think we could all use more haikus in our lives.

Image credit: haiku 4

Effective Tech in the Connected Classroom

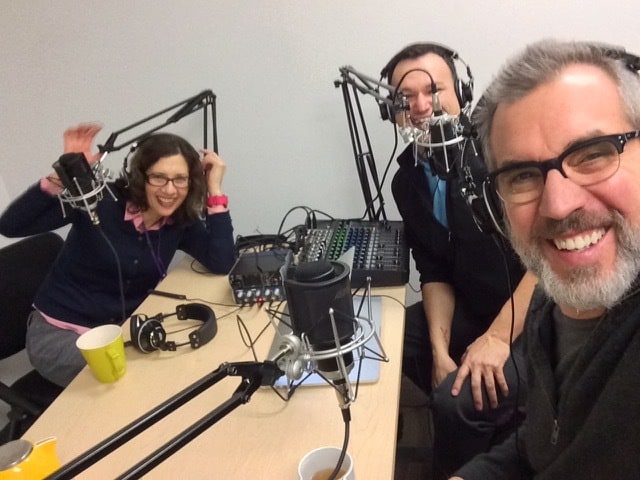
up-tech-talkI recently was a guest on the UP Tech Talk Podcast produced by University of Portland’s Academic Technology Services and hosted by Maria Erb (Instructional Designer) and Sam Williams (Dir of Academic Tech Services). Kudos for the great ATS podcast studio!

What’s the least amount of technology you could use to get the job done.

We had a lively 18 minute discussion about my UP social studies methods class and technology’s role in instructional design – it opened like this …

Maria: Peter, so glad to have you on the podcast. We just had a great conversation … you managed to rattle off probably half a dozen Web 2.0 tools that you’re using just like you were a fish swimming in water; it just seems so easy and natural for you. I’m just wondering, how do you go about choosing which tools you’re going to use for these great projects that you’re working on? What piques your interest?

Peter: I think it really begins with seeing yourself as a designer of a learning experience. You work with the tools you have and with the setting you have. You’ve got X number of students; you’re meeting once a week; you’ve got three hours with them. You think about the instructional goals that you want to achieve, and then from there, you say, okay, so what kind of tools are out there. For example, there was a situation where I wanted them to collaborate and design some lessons. I wanted them to be able to share their work with one another and be able to comment on it. I also think it’s important that there always be a public product, because I think we find our students producing content for their instructor as opposed to … which is kind of a ritualized thing as opposed to real-world content.

And ended with this exchange …

Sam: Are there any words of wisdom around it’s not about the technology that you could leave us at the end of this podcast?

Peter: I would say the big question is what’s the least amount of technology you could use to get the job done. Taking something and making it prettier by putting it on a white board when you could have written it up on the chalk board really doesn’t get you anywhere. I think that the transformative part of technology is getting it in the hands of the students so that they can research and create and produce in ways you couldn’t do without it. For me, those are the essential elements that I’m looking at, not simply just something that’s a bright shiny object.

Text transcript (word file) | Show notes and links | Podcast at iTunes: #12

The University of Portland uses the SmartEval system to gather student feedback on courses and faculty. Here’s a few comments from my UP students that are relevant to this podcast:

  • Peter challenged us to think and be designers of curriculum, instead of just lecturers. We learned how to get students working and thinking critically in the classroom.
  • I liked that the focus of the class was on making a product.
  • He also showed us how to move from the lecture mode to engaging students as architects in their own learning process.
  • Very well connected with other educators on Twitter. He has promoted every student in the class using his connections to help us build professional connections and build a professional online presence.

Originally posted at Copy / Paste Jan 21, 2015