Today I’m presenting “Locked Box Oregon,” to my social studies methods class at UP.
A little about the assignment… Our instructor asked us to prepare a 20-30 minute lesson that incorporates one or more historical thinking skills (sourcing, contextualizing, corroborating, & close-reading). A great summary chart of historical thinking skills can be found here. Ideally, this assignment gives us students of teaching an environment to test out a lesson plan idea, or as our instructor Peter likes to say, “kick the tires.” I can’t say this lesson is going to be perfect, or anywhere close to perfect, but hey, we learn best through failure and reflection so here it goes.
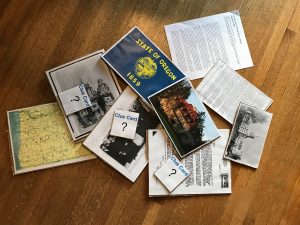
My idea is what I’m calling “Locked Box Oregon.” The activity mimics an escape room by asking students to find and follow a series of clues that ultimately lead to cracking a code and saving the day (or failing and trying again). For its classroom adaptation, I placed a fun prize inside of a toolbox and locked it with four small combination/key locks. Then I found a handful of primary source documents (pictures, documents, letters, maps) relating to the history of the state of Oregon and creatively embed within them the digits for the combination locks or the location of the key.
I got this lesson idea after watching John Zingale (a MS teacher at Vancouver iTech Prep) use it with his students. It was awesome to watch his 8th graders scramble, work together, and ultimately find and follow the clues to crack the code and break into the box.
Here’s the lesson plan:
Central Question
What can primary source documents tell us about the history of Oregon?
Materials
Toolbox, 3 combination locks, 1 key lock, 3 clue cards
Speaker to play mystery themed music. A timer.
Primary source documents: grid map of OR, Capitol of OR , Warm Springs Indians, Pittock Mansion First ascent of Hood KKK meets with Portland leaders KKK article Oregon flag
Depending on the age of the students, I would select different primary source documents. For the purpose of todays demonstration, I selected some more difficult documents in hopes of providing some challenge to my highly educated classmates. The instructor must serve as the curator of information in this activity (no small task, but loads of fun).

Activity
Instructor begins by introducing the activity to the students.
- The objective is for students to collaborate with their teammates (usually in groups of 4-5) to discover the numerical codes for the combination locks and find the key for the key lock.
- Students will have an allotted amount of time (in todays demonstration, 25 min) to break into the box.
- Rules: No prying, drilling, forcing the box to open. Teams will be disqualified from the activity if they break into the box using means other than the combination/key locks.
- Each team is given three clue cards that they can use anytime throughout the activity. Whenever the clue card is played, the instructor gives one hint to the team.
- A variety of written clue prompts are found throughout the activity. Prompts such as “Who’s first? Map it!, Where are you?” These all help students put the puzzle pieces together (the primary source documents) and ultimately find the combination/key to the locks.
Example of the investigative process used to find the combination for one of the locks.
- Clue: Map it!
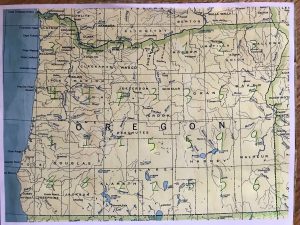
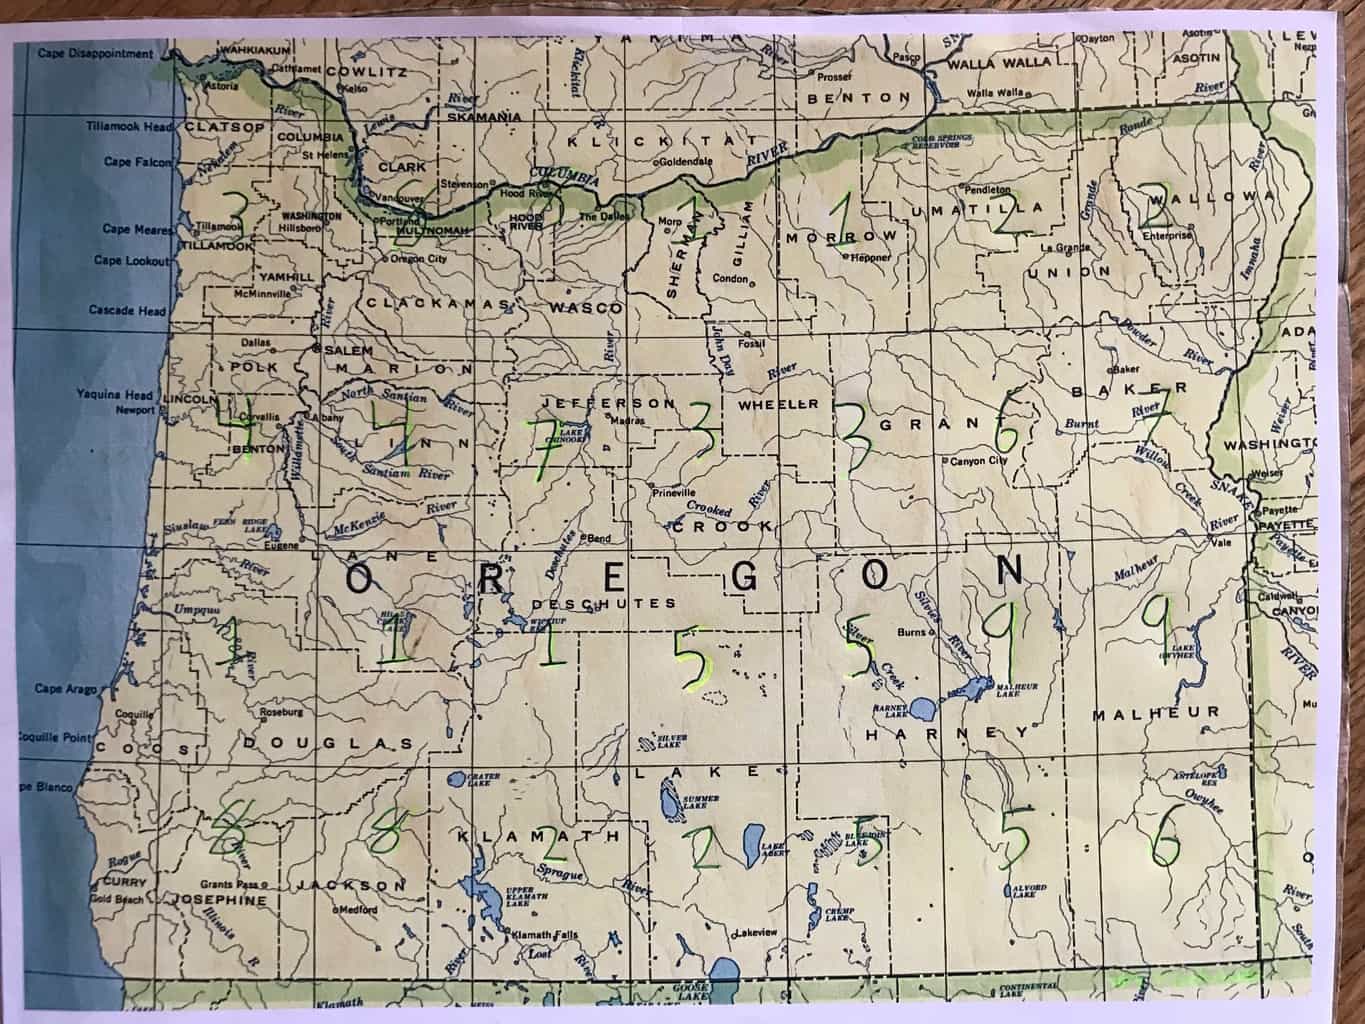
- Students will find a grid map of Oregon and will notice that each grid is labelled with a number (little hard to see).
- Through inquiry, students will discover that the location of each of the primary source documents corresponds to a grid area on the map. If the students have correctly sourced the documents and determined their original location, they will be able place the document in the correct grid and find the three digits used to crack the combination.
Another example.
- Clue: Who’s first?
- Students will discover that two of the documents mention the same historical figure (Henry Pittock). His famous mansion is located in the West Hills of Portland and he owned the Oregonian in the early 1900s. Upon further examination (context clues), students will learn that Pittock is generally attributed by historians as the first person to summit Mt. Hood in 1857.
- Solving this clue requires some close reading of the material–a USGS historical journal article. Students will notice that at the top of the document, the article notes that Littell’s 1854 climb is in dispute. In dispute with who? Well, Henry Pittocks 1857 climb.
- The lock combination is a four digit number, so it makes sense to try 1857, right? That’s it!
Reflection
To conclude the activity, it might be a good idea to ask the students to write a reflection of sort. This could look like a journal entry, short essay, poster, or blog post. Depending on where this lesson idea fits in the overall unit plan, the reflection prompts may change. Some ideas:
- Use this activity at the beginning of a unit to introduce students to the material and spark their interest. Ask students what they learned about the geography of Oregon after doing this activity and require them to back their statements up with evidence (e.g. “I learned that Mt. Hood is the tallest mountain in OR and that people have been climbing it since before OR became a state.” Refer to Henry Pittock).
- Or, use this activity at the end of a unit to reinforce learned ideas and themes. Ask students to write about a group of people important to Oregon state history (e.g. the Native Americans; the involvement of the KKK in state politics; the state’s populist origins, etc.).
Really, there’s lots of different ways this activity might look in the classroom. The important thing is student engagement. This set-up lends itself to student involvement because most all kids love playing games! The challenging aspect of this activity is the curation of material and how to connect it all with clues that aren’t too easy, too hard, or too irrelevant to the unit content.
Oh, and in regards to historical thinking skills– sourcing, contextualizing, corroborating and close-reading; this activity can be structured in ways that lean heavily on one or the other, or incorporate all three. My example primarily demonstrated historical sourcing because students had to find the original location of the document, and close-reading because of the emphasis on finding clues within the content of a document.
Conclusion
The mystery box, lock box, or whatever else you want to call it, can be a great activity to use with students as its student-centered, hands-on, engaging, and used primary sources. The tricky part is the execution, the timing, and the selection of material, but I’m confident that after a few test runs it will prove to be a go-to activity in any PBL classroom.
Featured image credit:
Detective
Design by Adobe Spark


.jpg)