This lesson focuses on developing historical inference skills and allowing students to function as “archaeologists” in a fun, interactive environment that helps students and teachers get to know one another better.
Prior to the lesson, ask students to create an “artifact box” about themselves: a box or bag filled with 4–6 “artifacts,” or objects that they believe represent something about themselves. These can be printed photos. Have students bring these in to class prior to the lesson.
Start the lesson by reviewing the concept of inference, and giving a short example. I chose to ask students to infer about neolithic people from cave paintings, since that is the content covered in my 6th grade placement.
Then ask students to grab a box that is not theirs, and pass out this (or a similar) graphic organizer for them to complete the artifact investigation activity: Artifact Investigation lesson.
After students have gone through the artifacts in their boxes and written observations and inferences on their graphic organizers, and answered the guiding questions on the sheet, have students share what they learned about their peer from the activity.
I was lucky enough to be able to test a data-based learning segment on a real live class. It is an 11th grade US History class, and the students were learning about the decade of the 1920’s. The topic of that day’s class was the African American experience in the 20’s; specifically the Great Migration (its causes and effects), and the Harlem Renaissance. Vocabulary and key terms included the farmer’s depression, lynching, race riots, and the KKK.
Often student connect to history via the storytelling aspect. I wanted to strike a balance between taking a look at the meta-data of the time while not losing that sense of personalized history. An educational app called Nearpod provided the perfect platform for such a lecture.
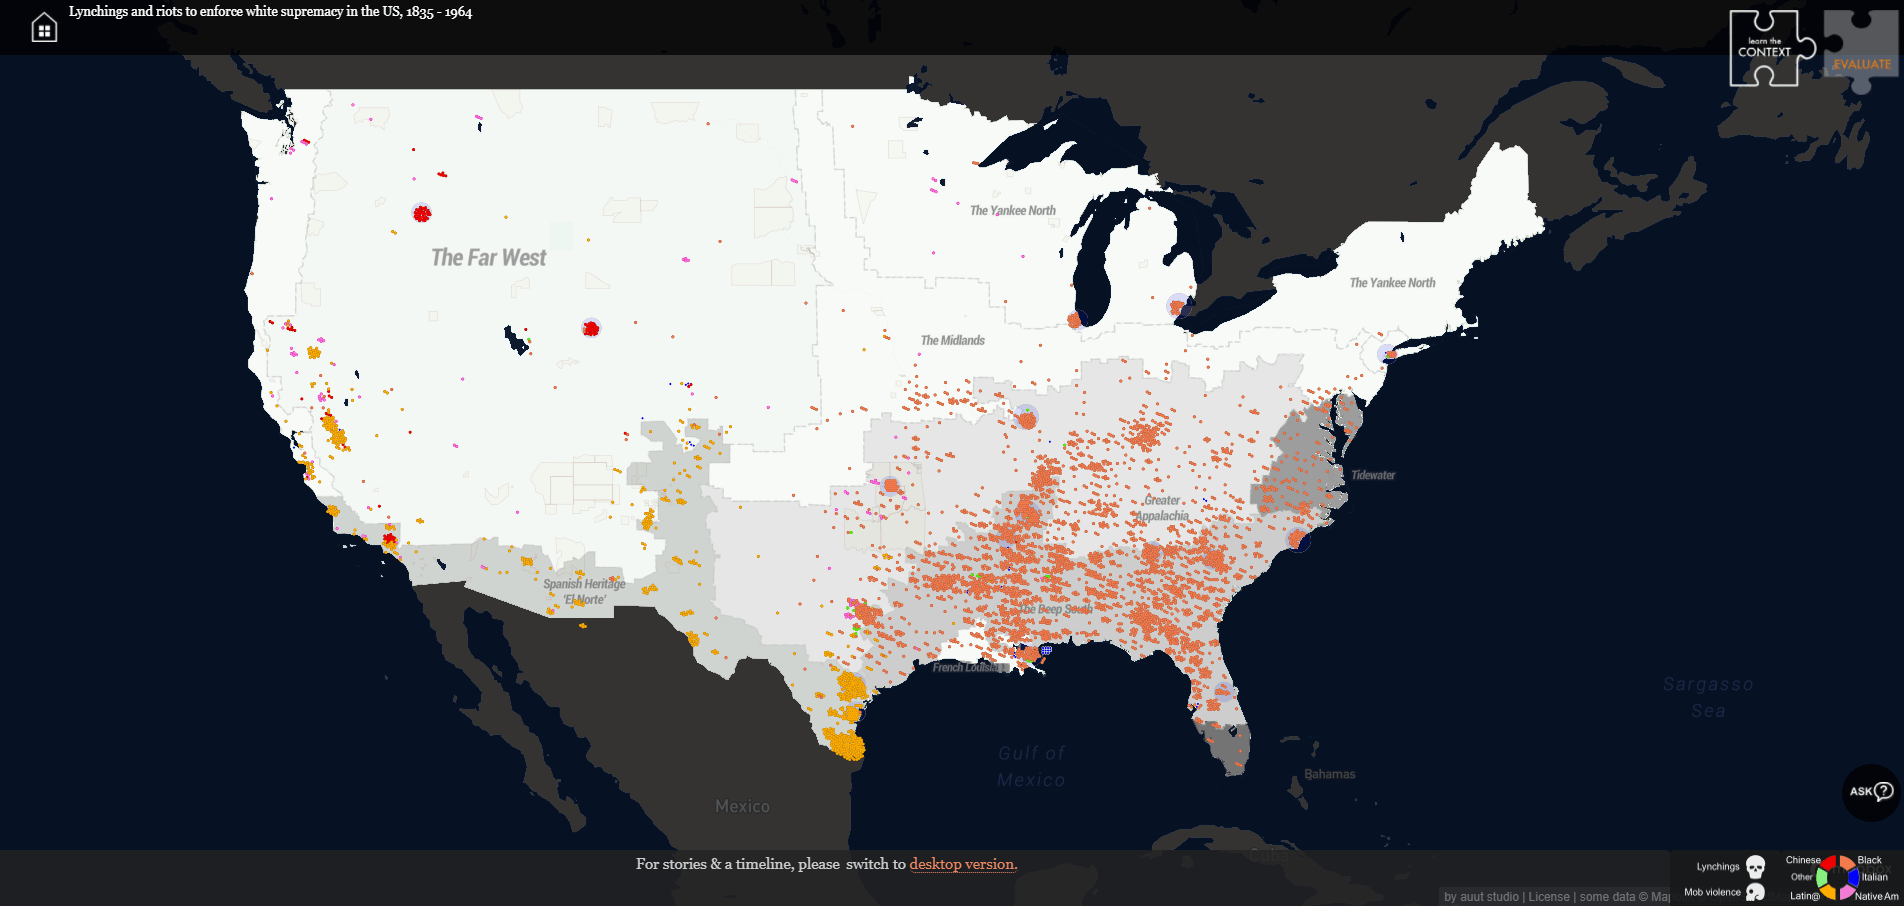
To begin, we took a closer look at the Great Migration. This included some of the hardships faced by those making the journey, some common destinations and regions of origin, etc. When discussing “push factors,” I had students click on the link within the Nearpod app, which each student was using on their own Chromebook, to this website. The website they arrived at contains an interactive map that shows every lynching to have been recorded throughout US history. Students can change the date range, zoom in on specific states, view clusters of attacks categorized as race riots, and discern the race of the victims using a color-coded key.
Students were prompted on how to navigate the site, how to adjust the date range, and what to look for. They were asked questions about what kinds of patterns they observed, etc. It was a stellar opportunity to incorporate higher level thinking questions.
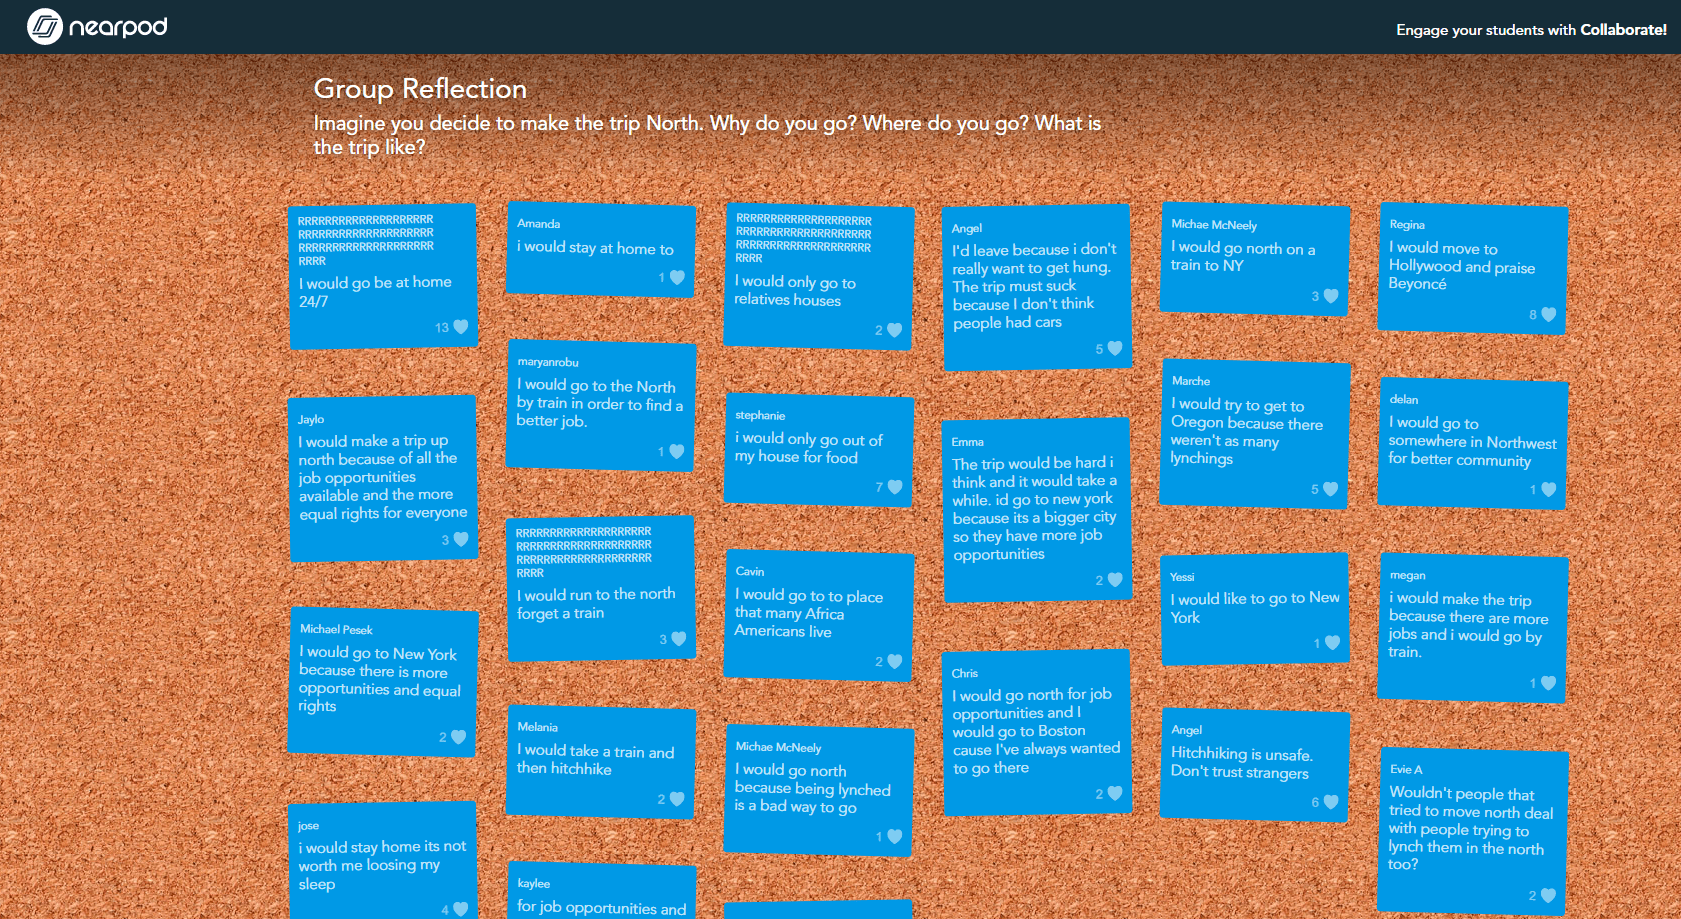
Next, they were asked to discuss collaborate whether,given the circumstances, they would have moved if they were alive at that time. The posts appeared to the class on the projector screen as a bulletin board with their messages posted onto it like notes.
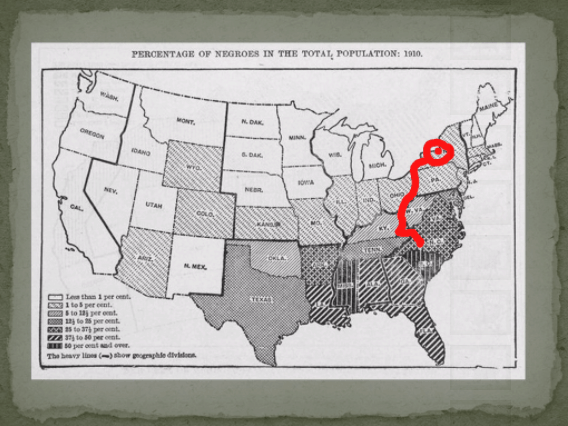
Lastly, students were shown a map of the South prior to 1920, with regions that had a high population of African Americans shaded in darker. They were asked to draw the migration route that they would take if they were plotting their escape. Here are some samples of their work:
This led to a discussion about whether African Americans would have been welcome in Oregon, why they settled in urban centers, and more. Overall, I think the data made a big impression on the students and played a significant role in shaping the lesson as a whole. I look forward to using more meta-data in the future.
My iPad rests soundly upon the wood table-top. A pad of legal notebook paper and a lonely Pilot G2 pen wait patiently, ready to jump into action. I lean back in the surprisingly comfortable swivel chair. My mind briefly wanders from the lecturing professor and the colorful PowerPoint presentation. The slides are big and clear, and the professor has a smooth voice, but just how many lectures can one sit through during the day. I think to myself how much coffee is left in my green HydroFlask–the answer is, not enough!
Lectures, notes, readings, papers, tests, grades, and repeat. This is often the rhythm of higher education. It’s a lock-step progression that all of us graduate students at the University of Portland have been trained in, and have been trained well.
However, this semester’s social studies methods class has shaken the bee hive and injected a little innovation and creativity into the dull plod of traditional education. It’s called project-based-learning (PBL), which according to the Buck Institute, “is a teaching method in which students gain knowledge and skills by working for an extended period of time to investigate and respond to an authentic, engaging and complex question, problem, or challenge.”
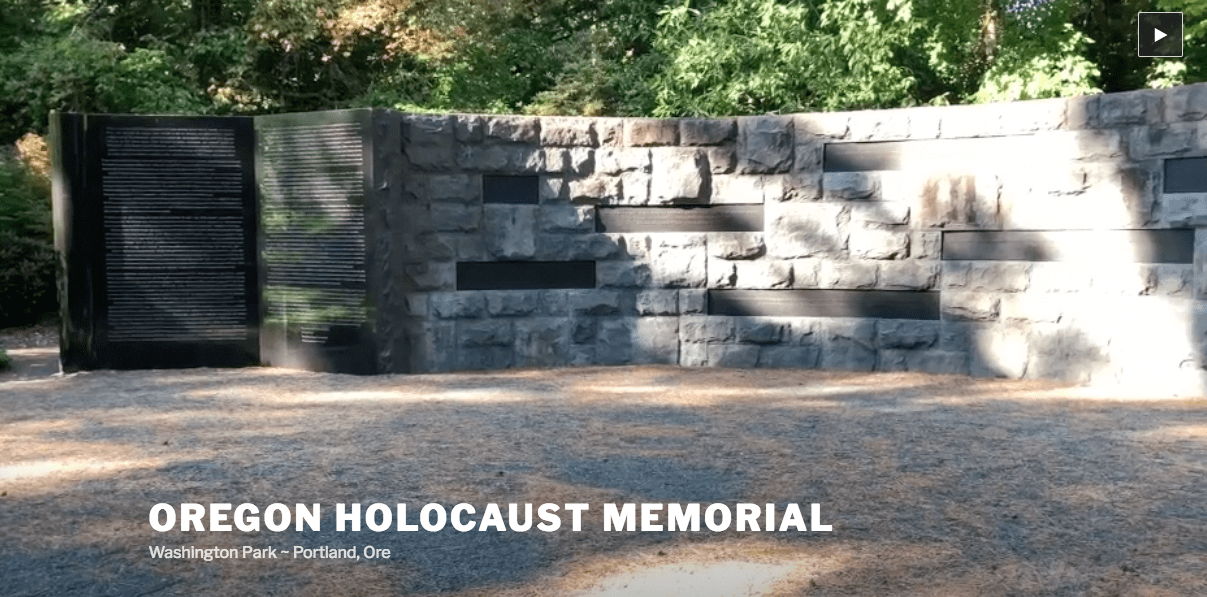
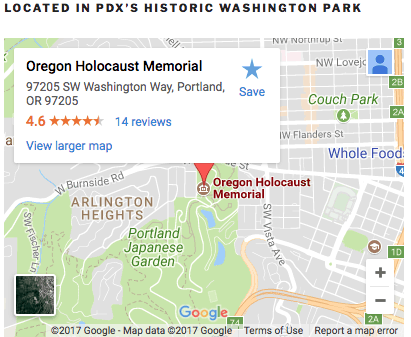
Instead of writing carefully structured papers and sitting for exceptionally routine multiple choice/short answer tests, the six of us graduate students, lead by our instructor Peter Pappas, designed a website for the Oregon Holocaust Memorial, located in Washington Park, Portland, OR. The project required us to familiarize ourselves with the non-profit company that oversees the Memorial–Oregon Jewish Museum and Center for Holocaust Education (OJMCHE)–and compile a variety of data and information to present on the website.
The Product
With lots of help from April at OJMCHE and our wise course facilitator, Mr. Pappas, our diverse group of wannabe social studies teachers, managed to produce a comprehensive Oregon Holocaust Memorial companion site. It includes information about the memorial, the impact of the Holocaust on Portland, a timeline of the Holocaust, and information for teaching about the Holocaust. I took the lead on developing the “Visit” page. Check out the site here.
What separates project-based-learning (PBL) from other instructional techniques, is that at the end of the day, after grades, and feedback, and anxiety filled finals week, students (that’s us) are left with a product that extends beyond the classroom. In this case, the product is the Oregon Holocaust Memorial website. But just imagine, if most classes were project driven, how many meaningful and authentic contributions could students produce? The possibilities are endless.
Take It Outside
A common complaint of higher education is that it exists in a vacuum. A protected environment insulated from the demands of the real world. Professors and students fill their time with hypothetical musings, idyllic aspirations for the future, and lots and lots of alcohol. PBL bridges the gap between academia and “real life” by giving students the opportunity to create products that will be used outside of school, outside of the university bubble. This makes the school work both meaningful and productive, qualities that every student should strive for–from pre-schoolers to Ph.D’s.
Don’t forget to check out the Oregon Holocaust Memorial website here!
This project was designed for teachers and students to experience the Oregon Holocaust Memorial from the perspective of instructors and learners. Other visitors can also use the tools and resources this site provides to enhance their experience.
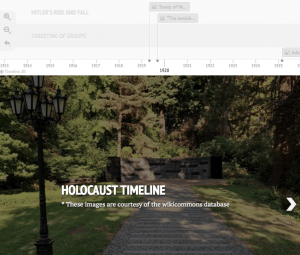
For my contribution, I helped design a timeline using knightlab that describes the events leading up to the Holocaust to the end of WWII. The timeline was corroborated by the United States Holocaust Memorial Museum and correlates with the events found on the memorial wall. All events were placed into two categories: the rise and fall of Hitler and the targeting of groups. This timeline can be used as a pre-visit tool for teachers to explain to students the events surrounding the Holocaust. I also put together a lesson that is compatible with the timeline (can be found on the time page).


