Class 1: Teachers

Timken Roller Bearing Co., calendar, September 1950, teacher at desk

Class 1 Overview

As an ice breaker, I’ll give students an activity to design a great history teacher-  a variation of “Tool 13: Brainstorm, Group, Label” from my Literacy Strategies Tool Kit (free PDF)

  • Ask them to brainstorm all the words or phrases they can associate with “a great history teacher.”
  • Give them Post-Its and asked them to write one associated word or phrase on each sheet.
  • Put them in groups and ask them to share their Post-its and thinking. Then design an illustration that captured their collective thinking. And be prepared to share that with the class.
  • Working in fours synthesize their individual brainstorming into a collective vision on large paper, then take turns sharing and responding to questions. Click to enlarge posters.

diagramEmoji

recipespell teacher

I’m giving my students a copy of my 1971 student teaching evaluation (2 page pdf) Quite a relic – Why did I save it?  We’ll examine it as an historic document with a critical eye for answering a number of questions: Who created it and why? Historic context? Point-of-view? What could we learn from it? What other sources might we need to collaborate?

We will explore what it tells us about NYS teacher preparation programs in 1971.

We will take a tech survey using LearningCatalytics

Assigned Readings for Class 2:

  1. Snapshot of a Modern Learner Mike Fisher in SmartBlog on Education
  2. How to Motivate Students: Researched-Based Strategies Peter Pappas in Copy / Paste
  3. A Taxonomy of Reflection: Critical Thinking For Students, Teachers, Principals Peter Pappas in Copy / Paste

Assignment for Class 2:

Think about “Santos” from Snapshot of a Modern Learner 

  1. What do you know about him? 
  2. How does he  best learn?
  3. How should he be taught?

Think about yourself as a learner. Use the same 3 prompts we used with Santos. Create a brief “selfie” of yourself as a learner that you can share with a classmate in our next session.

  1. It does not need to use an edtech perspective (as Santos’s snapshot did), unless that’s how you learn.
  2. It’s not actually a selfie. But, like Santos – it’s a Snapshot of a Learner – You
  3. It can take any form you choose – written narrative, cartoon, diagram, Powerpoint, Webcam video, Pinterest. (it doesn’t have to be digital). Think about “Reading 2” above. That’s why I’m letting you choose the product format.  
  4. It  should be something you can share with a classmate at our next class. Key point to consider – Will make sense to someone else without you having to explain it?

In class 2 you will share your “selfie” snapshot and we’ll take it from there. 

Based on edTPA

HSS2: How does the candidate use knowledge of his/her students to target support for students to develop understandings of facts, concepts, and interpretations or analyses to build arguments about historical events, a topic/theme, or social studies phenomenon?

HSS3: How does the candidate use knowledge of his/her students to justify instructional plans?


Image credit: George Eastman House
Timken Roller Bearing Co., calendar, September 1950, teacher at desk
Accession Number: 1976:0240:0019
Maker: Victor Keppler (1904-1987)
Date: Dec-1948

Facts or Fiction? There’s a Genre for that!

8469901653_805426a3c6_z

Lesson Study 1: Sixth Grade Book Genres
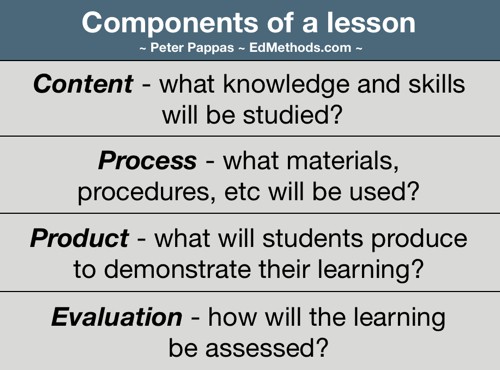
 Content:

Throughout the year my sixth grade Language Arts class is introduced to different genres of books so that they can practice how to best read the material for comprehension and overall enjoyment. By the end of the year, the goal is for each student to read at least one book from the different genres discussed. This introductory lesson is meant to familiarize the students with the concept of literary genre as well as facilitate a discussion about how to categorize books into specific categories based on the book’s content. Take note, this lesson is meant to span over two or three days so the students will be able to really solidify their understanding of genre as a concept and a tool to use throughout the school year.

Process:

Students are accustomed to completing a daily warm up in their composition notebooks each day. Today the warm up will be more open- ended in that students will be asked to give their opinion. The question they must answer will probably go something like this:

What makes a book interesting to you? What are your favorite parts of this interesting book? Take the next five minutes to list as many different reasons as you can for why you like this book. You don’t have to write in complete sentences.

After a short while, I will ask the students to share their opinions with their table groups on what the word ‘genre’ means and how the students’ descriptor words that they came up with in their warm up might help put books into different subject categories.

After the students are done sharing within their table groups, I will hand out a quick little handout that gives a brief overview of the different components of each genre. The handout will provide an overarching definition of genre at the top and list the various other types of genres. The students will be able to use this as a guide in case they forget a particular genre throughout the school year. I will choose random students to read through the genre definitions at this time.

But wait! There’s more!  The students will then be given a task to create a poster for around the room. They will create these in a group and will be assigned one particular genre from a list of genres at random. Using the given definition and their own brainstorms from their warm up, the students will be asked to create a poster that describes their particular genre. They will be given magazines, markers, glue, and whatever craft supplies their hearts’ desire to create a poster that gives examples of the genre along with key words associated with the genre. This will take some time to accomplish but once the posters are finished the students will be hang them up around the room. The posters will be a visual guide for the students so that they can quickly recognize different parts of different genres. The groups will then share their genres with the whole class and essentially ‘teach’ their peers all about their genre and the key words associated with the genre as well as give some examples from their poster.

Product:

The students will have a produced a poster that shows their understanding of their particular genre. Because this is a pretty lengthy introductory lesson, the overall goal is to connect students’ own understanding of a particular genre with terms and examples they already know.  The students should be given an opportunity to create their own idea of what a particular genre entails by using words and images that they understand. The idea is to create a foundation in which the students are asked to make their own connections to that is relevant and useful to them in the future.

Evaluation:

At the end of the first day of this lesson, I will assign the students to write a one page reflection in their composition notebooks about genre for homework. This reflection will ask the students to pick their favorite genre and explain why it is they like that particular genre using the key words and images they talked about in class. The students will also include their least favorite genre and why they don’t like it/ have trouble with it. Their reflection should include insight as to how the student can use genres as reading tools for categorization in Language Arts. This is somewhat informal in that I will use these to judge the lesson plans and provide the supports needed to the students who have difficulty understanding different categories of genres. The more formal evaluation will be the poster which will be grade mostly on content and originality as opposed to presentation and style.

What kinds of thinking will the students need to do to participate in the lesson?

Overall the students will need to:

  • Know the content
  • Differentiate or comprehend the differences between different genres
  • Create a visual aid that explains the particular genre using students’ own key words and phrases
  • Reflect on their own opinions and preferences about genres and how they can use genre as a reading tool in Language Arts

To what extent do the students have options or choices regarding these lesson components?

While I must provide the lesson materials, the students autonomy really boils down to the creation of their posters and the discussions they lead within their table groups. The group discussion is essential to creating an understanding between peers. Not only will discussion facilitate cooperation, but also give kids to share their different insights and concerns about the concept. The lesson is structured, but is also give the kids a chance to create a tool that will best suit them in understanding the content.

Reflection:

When I first set out to create this lesson plan I had an idea about how I wanted to incorporate more student autonomy into the process and finished product. What came out of my lesson was a snarling monster of note-taking and fill-in-the- blank that would have stifled my students’ creativity and essentially smashed any dreams of them owning their own education. So I did what felt right, and I deleted that lesson study. I threw it out, emptied my virtual trash can, and never looked back. Lesson #1 learned from our peer editing class was something simple and yet crucial to being effective and engaging in the classroom: Throw things out. Start over. Invent that new wheel. And if your lesson plans turn into yet another snarling monster that needs to be tamed, you fight it head on and start over. Your kids will thank you one day for saving them from the burden of a lesson plan that didn’t require their special talents in defeating a particularly hard concept.

Lesson #2 learned through the peer evaluation process required the lesson plans to be tamed rather than slain. The valuable information that I received from my two peer reviewers helped me to see the flaws I was dealing with in my lesson plan. The information may have been there, the delivery and student participation were minimal at best. Thanks to my two evaluators, I was able to take a step back and see how the lesson was relevant to my students. Were they making their own choices? Were they being allowed to use what they already know and construct their own ideas about the concepts learned? Were they allowed to interact with peers during the lesson? It’s these sorts of questions that I should have been answering in my first set of failed lesson plans and the same questions that I hoped to address in my second, improved lesson plan.

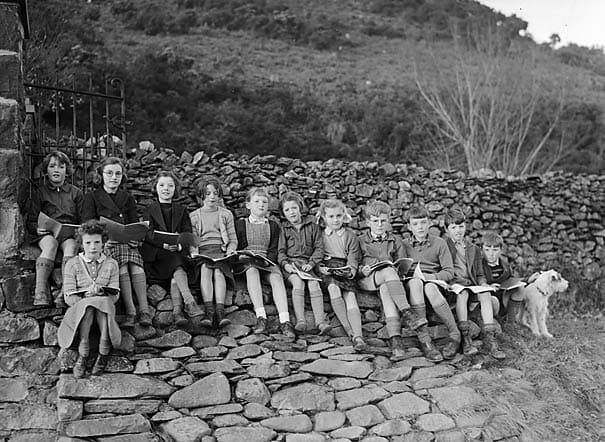
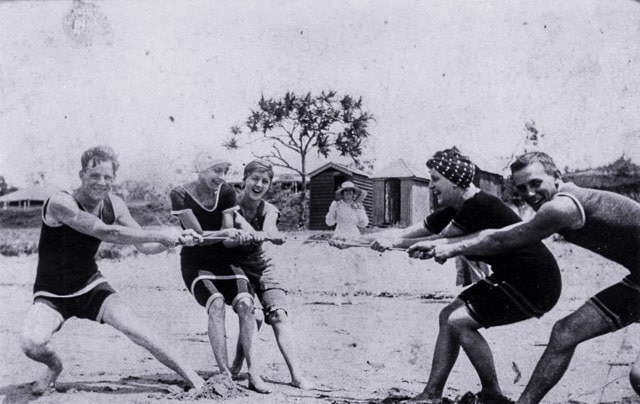
Photo title: Rural Wales needs £16,000,000

Photographer: Geoff Charles (1909-2002)

Accessed:  Europeana Libraries Project

Class 3: Peer Review / WordPress Tutorial

Beach tug of war at Southport, 1917

Peer Review

Last week’s class introduced key elements of lesson design and assigned Lesson Study I.  This week we are going to conduct two peer reviews of each lesson study, before it gets “turned in.” This models the student centered approach – with your peers sharing their higher-ordered review of your work – analyzing and evaluating it’s content. Following their feedback, you get to reflect on your work before turning it in.

We’ll manage the lesson study this way:

  1. You should bring in 3 copies of your 1st draft. (two to share and to one keep their notes on).
  2. You will be randomly put in the first peer review paring
  3. Meet and greet: exchange a quick 1 min intro to your lesson study – grade, subject, scope (one class lesson or a larger unit?)
  4. Exchange written drafts and study for 3 mins. Mark up your copy if you see typos or want to add suggestions. Develop 3 questions  you will ask for clarification.
  5. Student A questions B. Student B responds 3 mins
  6. Discussion / Brainstorming / B takes notes to captures modifications 3 mins
  7. Reverse roles with Student A’s work under review
  8. This should take us about 20 minutes to review each other’s work. You will then be assigned to another student to repeat the peer review process

After everyone has completed two reviews you will then have about 20-30 minutes to make revisions to you lesson study. (A good time to talk to the instructor as well). You should also write a personal reflection on what they learned in developing their first lesson study and participating in the peer review process

Submitting lesson study as blog post: See results here

Students will turn in their revised Lesson Study I assignment as a post on this blog by 10 PM Sept 10th. It should include their lesson study as well as personal reflection. Each post should also have a historic photograph (public domain with citation) that matches the theme or subject of their lesson study.

I’ve prepared some brief WordPress video tutorials. You can find them at this YouTube playlist / WordPress tutorials for using our class blog These tutorials were made with a free Chrome Plug in called SnagIt.

Assignments for class 4 on historical thinking
I’ve used the TEDEd flipped lesson feature to curate a existing YouTube and turn it into a lesson to support next week’s class on historical thinking: Who is the historian in your classroom? Another way to flip a class.

Also do one online reading Thinking Like a Historian By Sam Wineburg


Image source:

Beach tug of war at Southport, 1917
State Library of Queensland link

Class 2: Designing Lessons / Social Media Audits

Three key elements of student engagement
This week we consider two very different themes – social media and instructional design. The class begins by addressing key elements of lesson design :

  1. Higher-order thinking
  2. Student choice and reflection
  3. Effective classroom strategies

This  portion of the class lesson includes three major elements:

  • Practical examples of Bloom’s taxonomy in the form of sample exercises and questions. They are used to anchor a conversation on Bloom in action.
  • How student choice can impact key lesson elements – content, process, product, evaluation.
  • Demonstrate a student-centered approach to a teacher presentation as a way to foster reflection (instead of listening to a straight lecture on the subject)

The lesson is driven by a Keynote presentation. Handout (42MB pdf)  We will use an audience response system to gather student input. The lesson includes multiple activities that illustrate the content. Student will be led through discussing their reactions to the activities to connect them to the content. This lesson will serve as a kick off to their first assignment to write and share a Lesson Study.

key lesson components

In the second half of the class we’ll meet in small groups to share our personal social media audits. We’ll be focusing on rolling out our new Google+ Community and learning how to use some it’s features. It’s a private group and will serve as an extension of classroom discussion through posts, comments, and Hangouts.

Assigned Readings for Class 3: None

Written assignment for Class 3:

Lesson Study I is due next week.

The goal of this assignment is two-fold. First to offer supportive feedback on your lesson development through a peer review process. Second to offer some “lenses to look through” that help you easily see the essentials of a lesson. It is not a substitute for the School of Education lesson plan format. Think of it as a pre-lesson plan planning guide. This is not some exercise for the benefit of your instructor. This should be a process that works for you. So feel free to modify to meet your particulars. Use a scale that works for you – focus on just a small segment of a larger unit, or look at the entire unit. Don’t like Bloom? Use another schema to discuss the kinds of thinking that your students will need to successfully complete the assignment. Assignment here. (383 KB pdf) Sample lesson study (378 KB pdf)

See results of this assignment in the first student posts