Class 2: Visualizing Place

Where-Im-from

Places are locations having distinctive features that give them meaning and character that differs from other locations. Therefore, places are human creations, and people’s lives are grounded in particular places. We come from a place, we live in a place, and we preserve and exhibit fierce pride over places. National Geography Standard 4: Place

Today we will explore two different representations of place. This activity will be completed in class and serves multiple purposes:

  1. A demonstration of blended learning – offloading tech instruction to video so the teacher is free to assist students as needed.
  2. Exploring two representations of place using free tech tools.
  3. An opportunity to “introduce yourself” via your first blog post.
    You can find video tutorials for using WordPress here.

Students can choose from one of two platforms to visualize place – Haiku Deck or Google MyMaps.  After one of the visualizations, students will create a WordPress blog post on this site that includes an embedded version of the presentation and a written response to the question:

What have I learned from this activity and how might I use the learning strategies and / or technology in my teaching placement?


View student response to this assignment here – Where-16

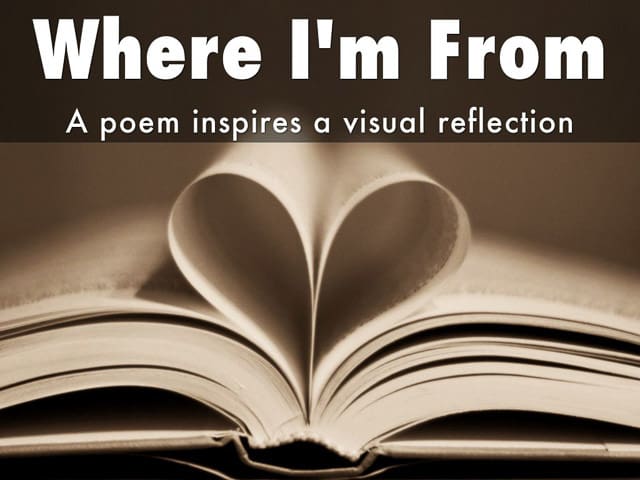
Visualization option 1- Haiku Deck

This option features a poem as a prompt for a creative reflection.

  1. After reading Where I’m From, students will use HaikuDeck to design a brief presentation that uses words and images to depict “where they are from.” The presentation should include a a title slide plus 6 slides which explore the place you’re from.
  2. After completing the HaikuDeck presentation, students will create a blog post that includes an embedded version of the presentation and a written response to the question:

What have I learned from this activity and how might I use the learning strategies and / or technology in my teaching placement?

Where I’m From by George Ella Lyon

I am from clothespins,
from Clorox and carbon-tetrachloride.
I am from the dirt under the back porch.
(Black, glistening,
it tasted like beets.)
I am from the forsythia bush
the Dutch elm
whose long-gone limbs I remember
as if they were my own.

I’m from fudge and eyeglasses,
from Imogene and Alafair.
I’m from the know-it-alls
and the pass-it-ons,
from Perk up! and Pipe down!
I’m from He restoreth my soul
with a cottonball lamb
and ten verses I can say myself.

I’m from Artemus and Billie’s Branch,
fried corn and strong coffee.
From the finger my grandfather lost
to the auger,
the eye my father shut to keep his sight.

Under my bed was a dress box
spilling old pictures,
a sift of lost faces
to drift beneath my dreams.
I am from those moments–
snapped before I budded —
leaf-fall from the family tree.

Visualization option 2 – Google MyMaps

Design a map representation of “Where you are from” or another place that is important to you. Design your map using Google MyMaps and be sure to include at least 6 destinations. Attach about 10 content elements to the map – these could be photographs, videos or links to attractions. You may wish to design it as a walking or driving tour of your destinations. All content should be geotagged to the map at its actual location (or close to it).

Scroll down for video instructions. Need ideas? Check out MyMaps Gallery and find more on MyMaps techniques.

When your map is complete, embed it in a blog post that details what you hoped to convey in your map, and/or what you learned from the experience.

What have I learned from this activity and how might I use the learning strategies and / or technology in my teaching placement?

Class 1: Teachers

Timken Roller Bearing Co., calendar, September 1950, teacher at desk

CLASS 1 OVERVIEW

As an ice breaker, I’ll give students an activity to design a great history teacher-  a variation of “Tool 13: Brainstorm, Group, Label” from my Literacy Strategies Tool Kit (free PDF)

  • Ask them to brainstorm all the words or phrases they can associate with “a great history teacher.”
  • Give them Post-Its and asked them to write one associated word or phrase on each sheet.
  • Put them in groups and ask them to share their Post-its and thinking. Then design an illustration that captured their collective thinking. And be prepared to share that with the class.
  • Working in fours synthesize their individual brainstorming into a collective vision on large paper, then take turns sharing and responding to questions.
pappas-rookie

I’m giving my students a copy of my 1971 student teaching evaluation (2 page pdf) Quite a relic – Why did I save it?  We’ll examine it as an historic document with a critical eye for answering a number of questions: Who created it and why? Historic context? Point-of-view? What could we learn from it? What other sources might we need to collaborate?

We will explore what it tells us about NYS teacher preparation programs in 1971.

ASSIGNment FOR CLASS 2:

Read

  1. Snapshot of a Modern Learner Mike Fisher in SmartBlog on Education
  2. The Reflective Student: A Taxonomy of Reflection (Part 2) Peter Pappas in Copy / Paste

Think about “Santos” from Snapshot of a Modern Learner

  • What do you know about him?
  • How does he best learn?
  • How should he be taught?

Reflect about yourself as a learner. Use the same 3 prompts we used with Santos. Create a brief “selfie” of yourself as a learner that you can share with a classmate in our next session.

  1. It does not need to use an edtech perspective (as Santos’s snapshot did), unless that’s how you learn.
  2. It’s not actually a selfie. But, like Santos – it’s a Snapshot of a Learner – You
  3. It can take any form you choose – written narrative, cartoon, diagram, Powerpoint, Webcam video, Pinterest. (it doesn’t have to be digital). Think about “Reflective reading” above. That’s why I’m letting you choose the product format.  
  4. It  should be something you can share with a classmate at our next class. Key point to consider – Will make sense to someone else without you having to explain it?

In class 2 you will share your “learner selfie” and we’ll take it from there.


Based on edTPA

HSS2: How does the candidate use knowledge of his/her students to target support for students to develop understandings of facts, concepts, and interpretations or analyses to build arguments about historical events, a topic/theme, or social studies phenomenon?

HSS3: How does the candidate use knowledge of his/her students to justify instructional plans?


Image credit: George Eastman House
Timken Roller Bearing Co., calendar, September 1950, teacher at desk
Accession Number: 1976:0240:0019
Maker: Victor Keppler (1904-1987)
Date: Dec-1948

Our New iBook – Exploring History Vol III

Exploring-History-IIIHere’s our new iBook just published by our Fall ’15 class at the University of Portland. Free at iTunes. Static pdf version Exploring History Vol III (29 MB)

It features thirteen engaging questions and historic documents that empower students to be the historian in the classroom. The units draw from a fascinating collection of text and multimedia content – documents, posters, photographs, audio, video, letter and other ephemera. “Stop-and-think” prompts based on CCSS skills guide students through analysis of the primary and secondary sources. Essential questions foster critical thinking. All documents include links back to the original source material so readers can remix the content into their own curated collections.

All of our students assignments had a public audience on this class blog and were designed to meet our three class goals:

  • Learn to think like a historian.
  • Become a skillful Instructional designer
  • Develop technical skills for production, reflection, growth and professional networking.

The lesson design process began early in the semester when students designed lessons in historical thinking skills based on the work of Sam Wineburg and the Stanford History Education Group (SHEG). They focussed on three key skills – Sourcing, Contextualizing and Corroborating. Then students identified essential questions worth answering and gathered documents to explore the question in an extended lesson design process.

Exploring History: Vol III was our PBL capstone and is available on iTunes in 51 countries around the world. Here’s a post (from fall 13 class) that describes our project workflow (including how we utilized iBooks Author).

Here’s Exploring History: Vol I created by our fall 2013 class. And Exploring History: Vol II designed by our fall 2014 class.

Here’s the US and World History lessons in chronological order:

  1. Finding Egyptian Needles in Western Haystacks 
by Heidi Kershner
  2. Pompeii by Caleb Wilson
  3. Samurai: Sources of Warrior Identity in Medieval Japan 
by Ben Heebner
  4. The Declaration of Independence by David Deis
  5. Reconstruction in Political Cartoons 
by EmmaLee Kuhlmann
  6. Regulation Through the Years 
by Chenoa Musillo Olson / Sarah Wieking
  7. Battle of the Somme by John Hunt
  8. The Lynching of Leo Frank by Jeff Smith
  9. The Waco Horror by Alekz Wray
  10. The Harlem Renaissance by Monica Portugal
  11. A Date of Infamy by Mollie Carter
  12. Anti-Vietnam War Imagery by Felicia Teba
  13. Examining the Ongoing Evolution of American Government by Eric Cole

Class 15: Publish or Perish

Civilian_Conservation_Corps,_Third_Corps_Area,_typing_class_with_W.P.A._instructor_-_NARA_-_197144We’ll be using iBooks Author to finish our iBooks today (Report to Digital lab / Clark Library). Here’s a  pdf copy of our rough draft “Exploring History Vol III” A collection of student-designed document based lessons.

Note: You will be adding your last blog post (reflection) as a final portion of the lesson. That can be your look back at the of the entire document based lesson process.

We will also take some time to complete our UP Smart Evals

Here’s a  few iBooks Author reminders:

  1. We will use the Inspector/ Document to disable “Hyphenate.”
  2. Your chapters will need your names. If you have a website, Twitter or LinkedIn page, etc – you can link to it so readers can find you.
  3. Some chapters need dates (or eras).
  4. Some have used sections, some not. That is your call. Unless the sections help deliver the content, we should consider eliminating them and going to chapter with pages.
  5. You will need to have links back to documents / content. They should not just link to jpg file, but the entire source as listed in whatever archive you used.
  6. Sources can be adjacent to document or at end of the lesson as Work Cited.
  7. All  links should all be checked to see if they work. To save space consider just using the words source and making it a hyperlink.
  8. Looking for icons to spice it up? Check out The Noun Project. They are free and should be cited in your sources
  9. Some of the images you used are bit fuzzy in resolution. We can look for higher resolution versions.
  10. If you have large images, you can use a setting to make the images pop out to full size. (inspector/ widget/ interaction/ goes to full screen)
  11. Some of you still have placeholder text in widgets “Lorem ipsum dolor sit amet….” That needs to be removed. iTunes will not accept the iBook.
  12. If you want to embed a video, we will use the Bookry site. Here’s a video how to
  13. I’ve created a YouTube channel with some short tutorials – iBooks Author Tips

Image Credit: Civilian Conservation Corps, Third Corps Area, typing class with W.P.A. instructor ca. 1933
National Archives and Records Administration Identifier: 197144