
8th Grade Social Studies
This lesson is meant to serve as a transition from the first cities of humanity and into the world of Ancient Mesopotamia. This lesson serves to teach students the value of artists renderings versus the use of tradition evidence.
Requisite Knowledge:
- A working knowledge of the origins of the first cities.
- The lifestyles of nomadic peoples and city dwellers.
Learning targets:
- Contextualization
Learning Segment Goal:
Students will apply their precious knowledge of early humanity to answer questions that focus on the comparison between the Sumerian City Dwellers and the Nomadic Shepherds of the Middle East. Students will also begin to question what makes a primary source valuable and what place speculation has in history and archaeology.
Part 1: Shelter
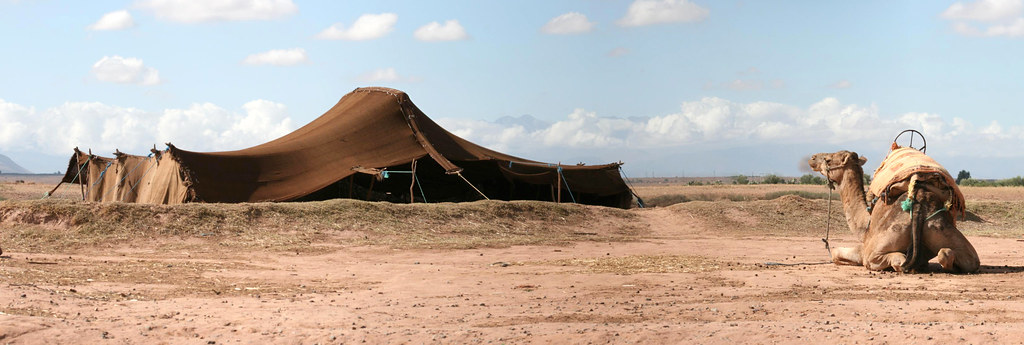
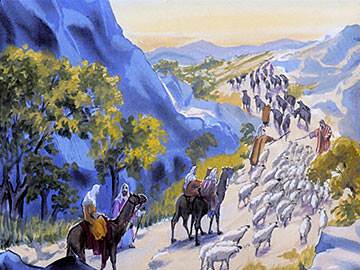
Students will begin the class by looking at these two images that would be projected onto the board.

After looking at these two images, the students will be asked a series of questions that pertain to who lived in these societies and why they chose to live there. Possible questions could include:
- What kind of people do you think lived in each?
- What is the main difference you see between the two images to the side?
- Why do you think some individuals decided to live in Image 1 and not Image 2?
Simply put these two images depict ways of life that have existed simultaneously since the Neolithic era: those of the city-dwellers and the nomadic peoples. Though more pronounced in the days of Sumer, these two groups have co-existed since ancient days. By looking at these pictures, the goal is to teach the students about function of architecture and how that relates to the way we choose to live our lives.
Part 2: Food
This section of the lesson is meant to teach the students about how the choice of food for a society can affect the way they live, beyond dietary and health reasons. Again the students will be called to look at a pair of images. This time however, the students will be asked to match the appropriate images from part one. On the projector, all four images should be displayed.


After the students match the images individually, they will present their choices to the class. Once the correct answers are established, the teacher will ask questions pertaining to what is in the image and how it pertains to the images of shelter in the previous section. Possible questions include:
- What are pictured in the above images?
- Why would the people in both images choose to live in either form of shelter? What are the advantages of moving? What are the advantages of staying in the same place?
The purpose of these questions should be to get the learner to examine the cause and effect relationship that is food and shelter.
Part 3: Contextualizing Sources
This final portion of the lesson is meant to serve as an introduction in to historical methodology by utilizing the images/sources we have just used. The teacher would open up the section by asking if the students have noticed anything about the majority of the images. The answer to this is that most of the images are not photographs but drawings or renderings of objects. The following questions will then be asked of the students:
- Why aren’t actual photographs of the city of Ur useful for learning about it?
- Why are artist renderings useful as when we compare things from thousands of years ago?
Two final images will be presented in conjunction with Image 1 and 2 of part 1. These images show either an actual photograph or artists depiction.


By comparing these new images to the old ones, students should begin to understand that while actual physical evidence is key to our understanding of what has happened in the past, artist renderings allow us to fill in the blanks (in an academic sense) by literally filling in the blanks.By seeing beyond the ruins and to what was once there, we begin to see the scope of what life was like.
Sources:
Image 2: https://c2.staticflickr.com/2/1197/5131225113_1bcd1df0aa_b.jpg
Image A: http://ubdavid.org/bible/know-your-bible1/graphics/2_abraham-wealth-livestock.jpg
Image B: http://www.boshraamin.com/wp-content/uploads/2010/05/encarta-sumerian-agriculture1.jpg
Image 3: https://upload.wikimedia.org/wikipedia/commons/f/f7/Ur-Nassiriyah.jpg
Image 4: https://ferrelljenkins.files.wordpress.com/2012/09/bedouin-tent-model_tel_halif_fj090111_0164t.jpg
Reflection:
While designing this lesson, I became acutely aware that contextualizing is not truly apparent in the first two sections of the lesson. Instead I have come to understand that the academic knowledge that the students are learning will allow me to transition into a more direct discussion on how and why a primary source is to be considered viable. By familiarizing the students with the sources beforehand, I think this makes the final section more understandable and applicable in their eyes.
