

Overview
Each student in the class will remotely “teach” a 20-25 minute learning activity. The rest of the class will act as participate / observers – serving as “students” during the lesson and afterwards, giving feedback to the “teacher.”
“Teachers” have prepared a learning activity and written an blog post following guidelines outlined here in assignment 7. All posts were due 10/16 regardless of which class students will teach.
Schedule for teaching remote demo lessons:
| October 19 | Alex Pilat | Zoom Video Crisanto De Guzman | Zoom Video Francesca Duncan | Zoom Video Tyler Soldat | Zoom Video (Some content on NearPod, not in video) |
| October 26 | Justin Loye | Zoom Video Nicolas Vavuris | Zoom Video ((Some content on NearPod, not in video) |
| November 2 | Angela Nguyen | Zoom video Maggie Loft | Zoom video (Some content on NearPod, not in video) |
| November 9 | Lillian Healy Alex Priaulx |
Class Session | Full Class Zoom Video
Participate / observers will use the following prompts to guide their feedback immediately following the lesson.
- Content: as a student, what were you learning – facts, skills, insights?
- Process: what did you see the teacher do to set up and deliver the lesson?
- Product: what were you, as a student, tasked to “do / produce” to demonstrate your learning?
- Assessment: as an observer, how did the lesson go? Insights on content, delivery, workflow. Suggestions?
Assignment 8: Explain with Video | Videos 20-A8
Students will design and record a short video explainer (5 minutes or less). They will embed the video into a blog post and briefly describe lesson context, audience and purpose: For example, is this to help parents with homework? Or to provide students background for a new unit.
A lot of a teacher’s time is spent explaining things to students – typically by talking to them. But teachers can create short videos to explain things that otherwise would need to be repeated. In this class, we’ll look at a few ways to “automate” explanations with video. Teaching with videos is a great way to flip a class or create “stations” in a virtual classroom.
Options:
1. Do a screen capture using QuickTime Player (built into Macs)
2. Do a screen capture using Loom (a free app) or any other screen capture tool you like.
2. Sketch out a lesson and videotape it with your smartphone
HERE’S A FEW TIPS FOR VIDEO CREATION:
- Keep it simple. Think of audience and purpose.
- Keep it short. Why make students sit through a long how-to?
- If you can, use a plug in mic (just a standard smartphone earbud mic works well). Do a quick test to check the volume level and mic position first to get sound level right.
- Practice a few times to find efficient ways to demonstrate and describe what you’re doing.
- If you will be entering much text as part of the task, I create a text document first so I can copy/paste text into what you’re demonstrating ( I hate watching videos of people typing.)
Resources
Mac Quicktime Player
This video shows an older Mac running Quicktime Player.
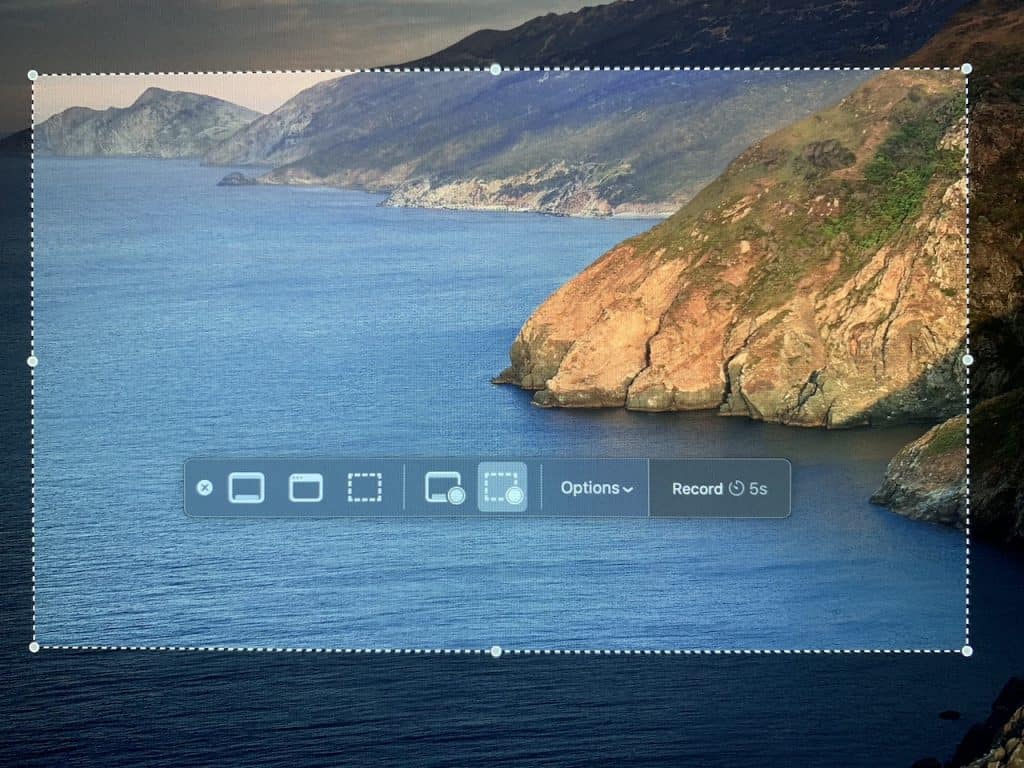
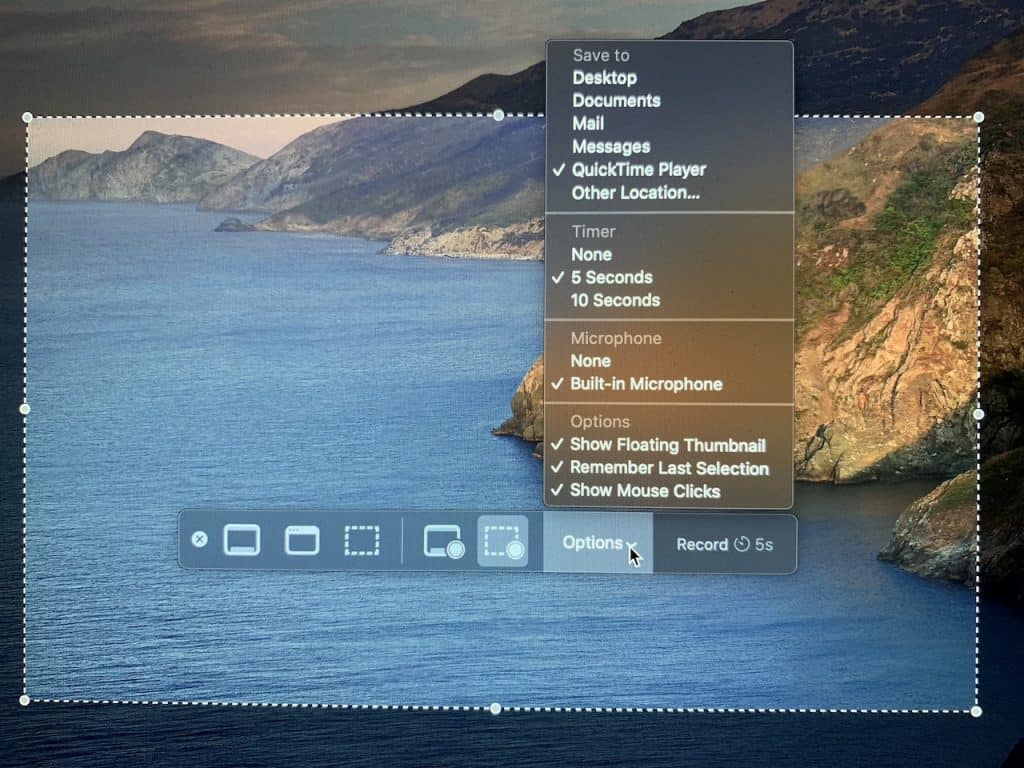
This is how the Quicktime Player record controls look on latest version of Mac OS Catalina.
The process is the same as the video above – just slightly different controls.
Scroll through two images.
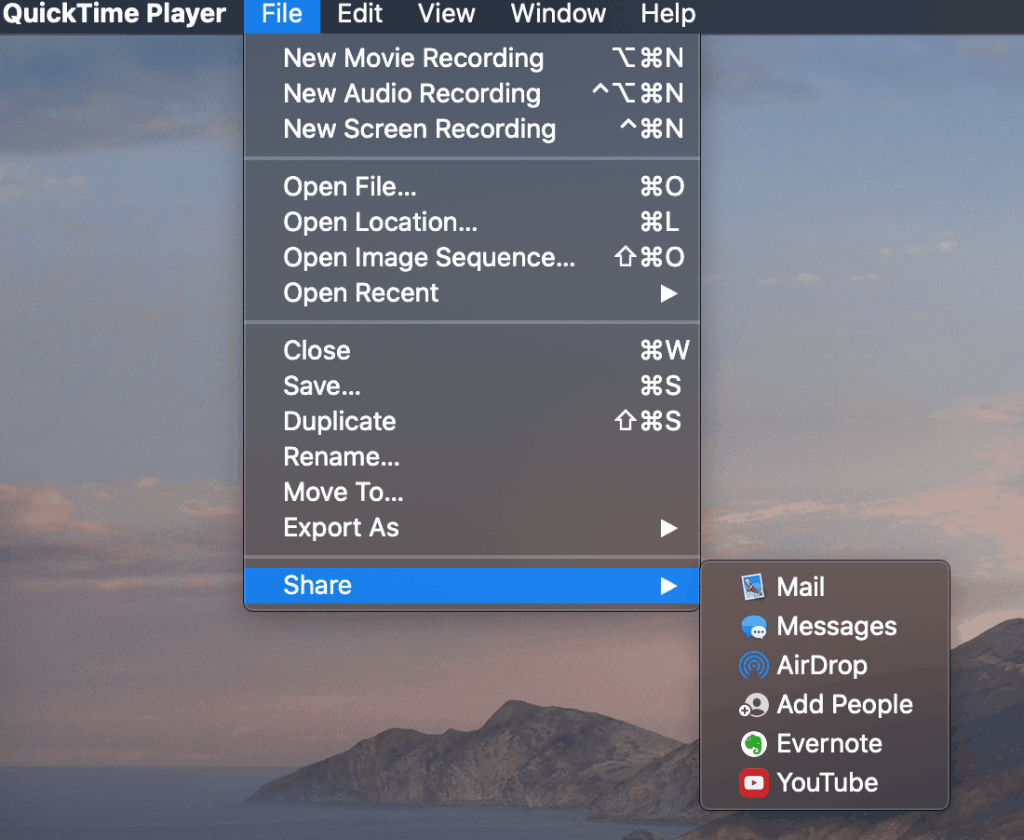
Once you have finished your screen recording. You can upload to YouTube directly from QuickTime using “Share”

Once your video is on YouTube get your YouTube video’s URL and paste it into YouTube Block in WordPress
Option 2 – Create a Screencast using Loom
The video below is a quick intro to Loom. In it the teacher suggests using it to narrate a Keynote presentation. Loom will host your video on their server. So you can easily email a link of the video to your students. And there is no need to upload your video to YouTube. Here is how to get the Loom embed code.
Option 3 – Sketch out a lesson and videotape it
Shoot a video using your smartphone. You can use little slips of paper or you could draw. If you’re not an artist, you could also shoot a video of you reading a picture book.
Note: You’ll need an extra pair of hands or tripod rig to hold the phone.
Hosting the video
If you use Quicktime Player, you should plan to upload it to your YouTube account and embed using the YouTube block built into WordPress.
If you use Loom – that service will host your video. You will need to get an embed code from the app and embed into your post using HTML Snippets.
If you shoot a sketch video on your phone, you can transfer it to a computer and then upload to YouTube from there. Embed using the YouTube block built into WordPress.